Create a Conference
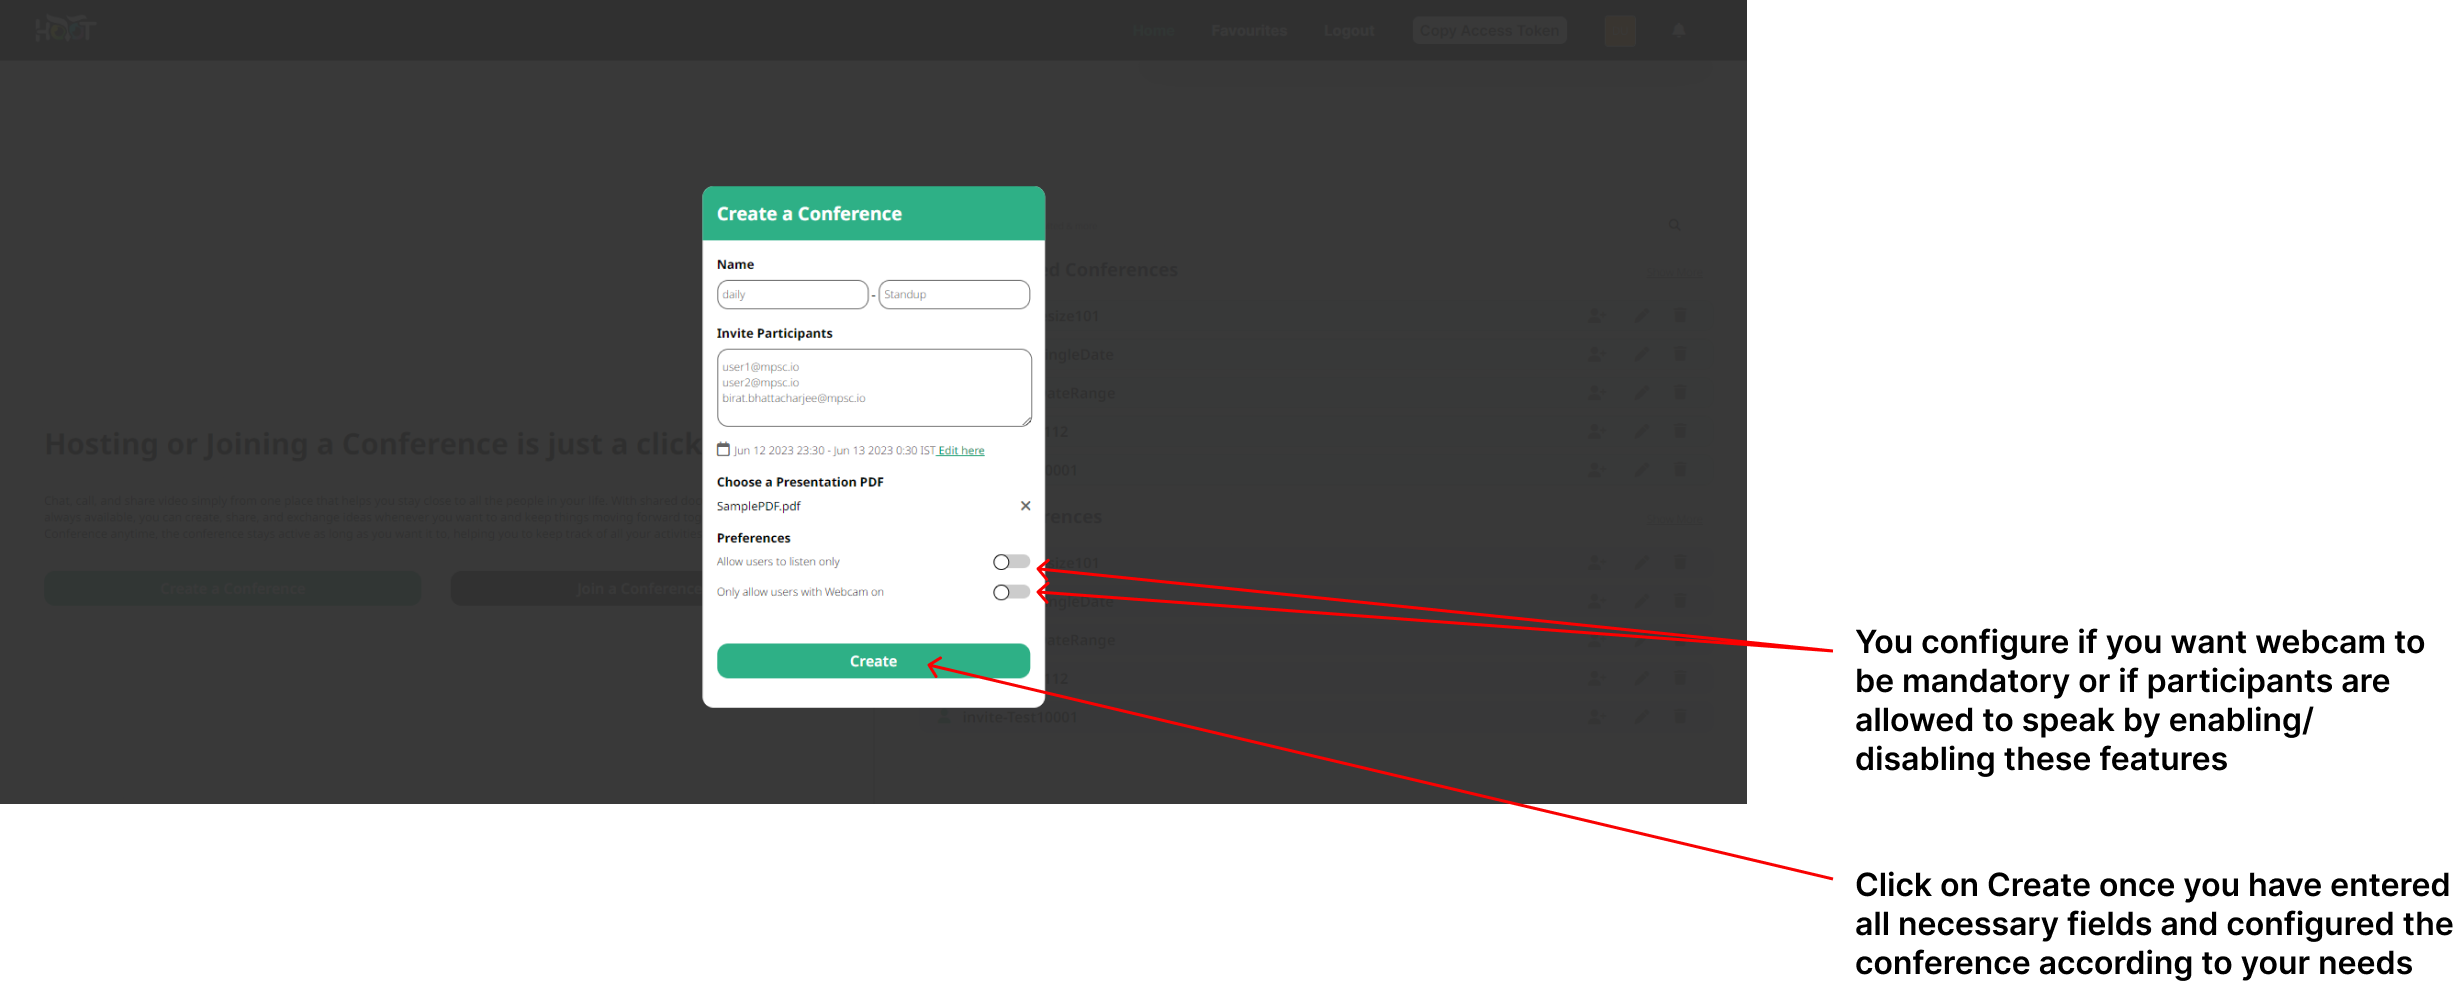
On the Dashboard, click on the “Create a conference” button as that will open the create conference dialog, as shown in figure 4.0.
Enter unique conference id and email id of participants in the designated text fields as shown in figure 4.0.
You can also add a conference invite while creating the conference. Click on click here text beside Pick date & time prompt, which will open the invite dialog.
Select date or a date range, your desired timezone and invite start and end time as shown in figure 4.1.
You can also upload a PDF document to be used for presentation, while creating the conference. Click on the click here prompt under Choose a presentation PDF, to select a PDF from your local storage. Once the PDF is selected, the PDF file name will be shown under Choose a presentation PDF. Refer to figure 4.2.
You can configure if webcam is mandatory, and if participants can speak in the conference using the toggle buttons for the same, provided under features section as shown in figure 4.2.
Click on “Create” button as shown in figure 4.2.
On successfully creating a conference, you will get a message that Conference has been created and the dialog box will close.
In case of any unexpected error. Contact the system administrator.
Note: There is a file size limit to PDF you can upload, which is currently set to 300 kb.


